Aquarium Substrate Guide: From Aquasoil to DIY Dirt
By FishKeepingLifeCo | Updated March 2026
When people start a planted aquarium, they often focus on lighting, plants, and fish. But one of the most important parts of the entire system is the substrate.
Substrate does far more than just hold plants in place. It affects plant growth, supports beneficial bacteria, and can even shape the entire layout of your aquascape.
From premium aquasoil to simple sand or even DIY dirt, there are many ways to build a planted tank — and understanding what each substrate does makes choosing the right one much easier.
Understanding What Substrate Actually Does
Before choosing a substrate, it helps to understand its role in a planted aquarium.
Substrate serves several important purposes:
- Anchors plants so they can root and grow
- Holds nutrients that plant roots absorb slowly
- Provides surface area for beneficial bacteria
- Supports the physical structure of the aquascape
One thing many beginners misunderstand is the role of soil. Soil doesn't feed plants instantly — it acts as a nutrient reservoir, with roots slowly drawing out what they need over time.
This slow uptake is actually beneficial because it creates stable plant growth instead of sudden nutrient spikes in the water column.
Eventually, those stored nutrients will be used up. When that happens, many aquarists supplement with root tabs or liquid fertilizers to keep plants healthy.
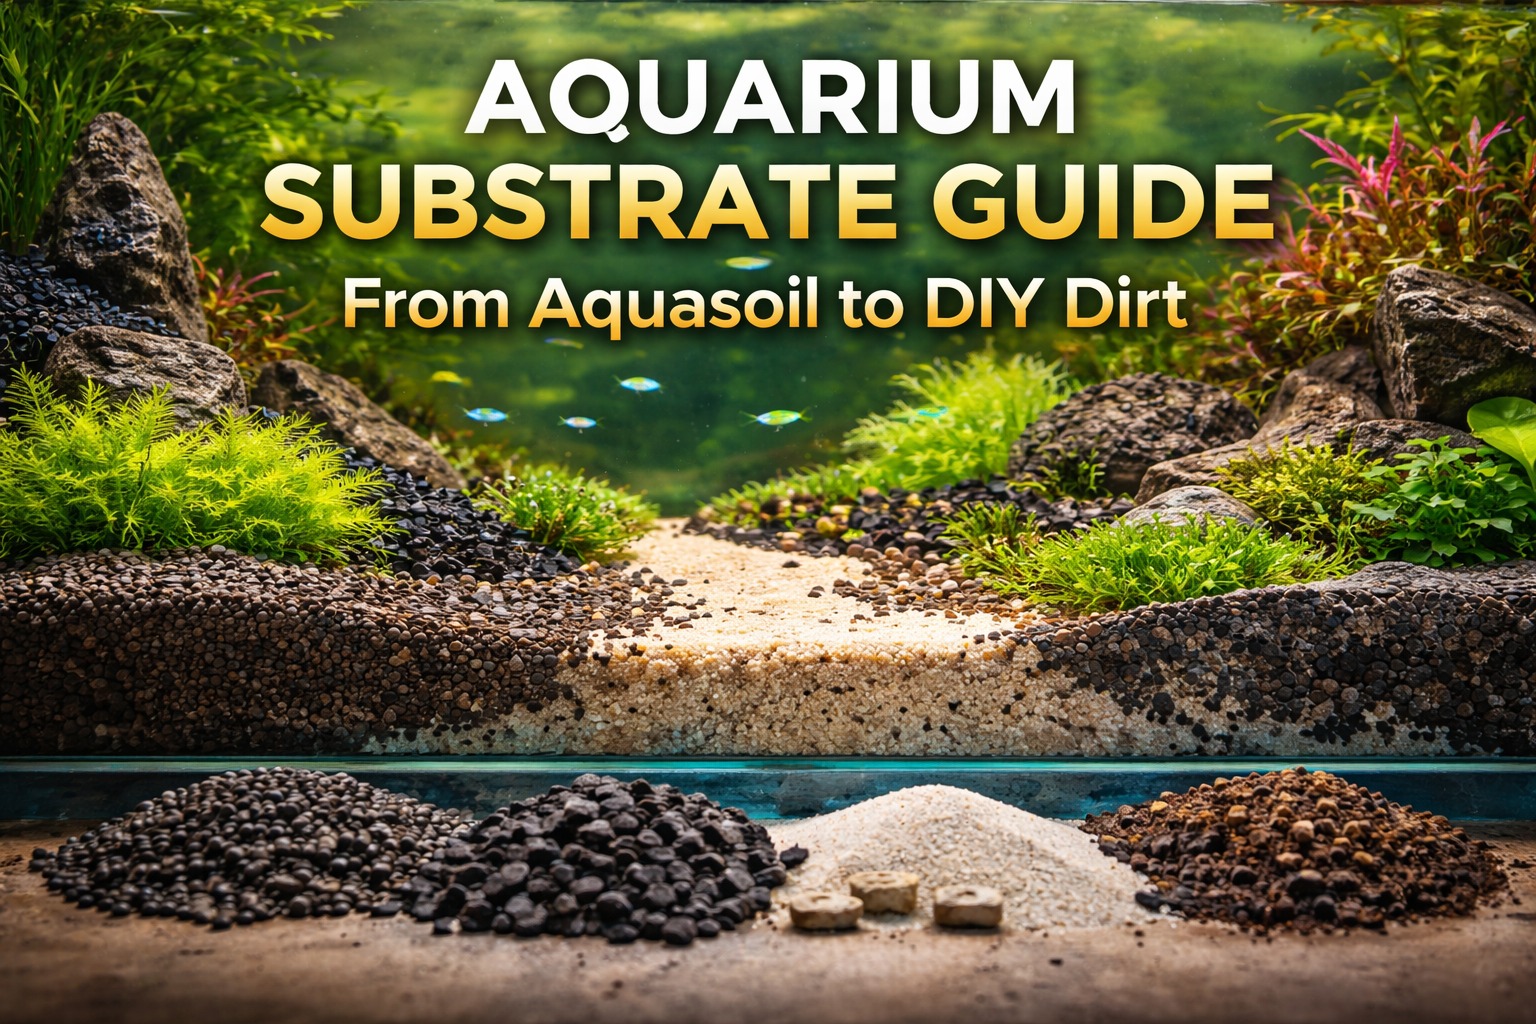
Ready-Made Aquasoil
Aquasoil is a commercial substrate designed specifically for planted aquariums. It is typically made from nutrient-rich clay formed into small granules.
Common aquasoil brands include:
- ADA Aquasoil
- Fluval Stratum
- UNS Controsoil
- Tropica Aquarium Soil
Aquasoil has become popular because it simplifies planted tank setups. It already contains nutrients accessible to plant roots, and its granule structure allows water and oxygen to move through the substrate easily. Many aquasoils also slightly soften water and lower pH, which many tropical plants prefer.
Advantages:
- Contains built-in nutrients
- Excellent for root development
- Easy to plant into
- Ideal for aquascaping layouts
- Supports carpeting plants
Downsides:
Aquasoil can be expensive, especially in larger aquariums where several bags may be required. Some brands also release ammonia during the first few weeks, which means extra water changes may be needed during the cycling phase.
Inert Substrates
Inert substrates contain no nutrients. Plants instead rely on fertilizers or root tabs for nutrition.
Common inert substrates include:
- Aquarium gravel
- Pool filter sand
- Black diamond blasting sand
- Standard aquarium sand
Despite lacking built-in nutrients, many successful planted aquariums use inert substrates. When combined with root tabs and occasional liquid fertilizers, plants can grow very well.
Advantages:
- Affordable
- Easy to find
- Long-lasting
- Easy to maintain
Downsides:
Heavy root feeders like Amazon swords or Cryptocoryne may need regular root tab supplementation. Very fine sand can also compact over time, which may reduce oxygen circulation around plant roots.
Using Lava Rock for Aquascaping Structure
One technique experienced aquascapers often use is building the structure of an aquascape before adding substrate.
Instead of filling the entire tank with expensive aquasoil, many hobbyists use lava rock as a structural base. It works well because it is:
- Lightweight
- Porous
- Inexpensive
- Excellent for beneficial bacteria
Large pieces of lava rock can form the foundation of hills and slopes. Smaller pieces can be placed inside mesh bags and stacked to create elevated areas. Aquasoil or sand is then added on top to form the visible substrate layer.
Advantages of this approach:
- Uses less aquasoil
- Creates stable hills and slopes
- Adds depth to the aquascape
- Reduces overall substrate cost
Many professional aquascapes use this method to achieve dramatic elevation changes and natural-looking terrain.
Layered Substrate Systems
Layered substrates combine a nutrient-rich base with a protective cap layer.
A typical setup looks like this:
Bottom layer — Nutrient substrate, aquasoil, or soil
Top layer — Sand or fine gravel cap
The cap keeps nutrients contained within the lower layer while still allowing plant roots to reach them. This method can support strong plant growth while reducing the cost of filling the entire aquarium with aquasoil.
Advantages:
- Delivers nutrients directly to plant roots
- More affordable than full aquasoil setups
- Supports strong root development
Downsides:
If the layers are disturbed too much, nutrients from the lower layer can enter the water column and contribute to algae issues. Fish species that dig heavily may also mix the layers over time.
DIY Dirt Substrate
For hobbyists looking for a natural, budget-friendly option, a DIY dirt substrate can work extremely well.
"Dirt" here means organic potting soil from a gardening or hardware store — not aquarium-specific products. This is one of the biggest advantages of the method. There's no aquarium markup, so a bag of potting soil costs only a few dollars compared to premium aquarium substrates.
That said, it's essential to check the ingredients before using any soil. You want a simple organic mix with minimal additives.
Avoid soils that contain:
- Copper
- Chemical fertilizers
- Pesticides or herbicides
- Moisture control crystals
- Manure or heavy-feeding compost blends
Copper and certain chemicals can be harmful to aquarium life, especially shrimp and snails. The goal is plain organic potting soil that provides a steady, long-term nutrient base for plant roots.
How the Dirt Method Works
A thin layer of soil is placed at the bottom of the aquarium and capped with sand or fine gravel.
A typical setup looks like this:
Bottom layer — About 1 inch of organic potting soil
Top layer — About 2 inches of sand or fine gravel
The cap keeps the soil contained while still allowing plant roots to grow through it. Plants then slowly absorb nutrients from the soil, providing steady and natural growth.
How to Prepare Potting Soil for an Aquarium
A little preparation goes a long way in preventing issues later.
1. Sift the Soil
Many potting soils contain wood chips, bark pieces, or large debris. Remove these before adding the soil to the tank by sifting through a simple screen or picking out larger pieces by hand.
2. Lightly Moisten the Soil
Dry soil can create dust clouds in the tank. Adding a small amount of water and mixing it in helps the soil settle more easily.
3. Keep the Soil Layer Thin
A thick soil layer can release too many nutrients at once. Most dirted tanks use about one inch of soil before adding the cap.
4. Add the Cap Layer Carefully
The sand or gravel cap should be at least two inches thick to properly contain the soil. Adding it slowly helps prevent the layers from mixing.
Optional Advanced Step: Mineralizing Soil
Some aquarists mineralize soil by repeatedly soaking and drying it before adding it to the tank. This helps break down organic material and stabilize nutrients. However, this step is optional — many successful dirted aquariums skip it entirely.
Choosing the Right Substrate
The best substrate depends on your goals, budget, and aquarium style.
- For the simplest setup, aquasoil is often the easiest solution.
- For a budget planted tank, inert substrates paired with root tabs can grow many plants successfully.
- For a natural ecosystem approach, DIY dirt can produce impressive plant growth at very low cost.
Many successful planted aquariums combine techniques — for example, using lava rock for structure with aquasoil or sand forming the visible surface layer.
Final Thoughts
A planted aquarium truly starts from the ground up.
Understanding how substrates store nutrients, support plant roots, and shape aquascapes creates a stronger foundation for the entire ecosystem. Whether you choose aquasoil, sand, gravel, or DIY dirt, the goal is the same: give plant roots steady, reliable access to nutrients over time.
Once plants begin to thrive, they contribute to cleaner water, healthier fish, and a more balanced aquarium overall.
Track substrate, plant growth, and maintenance with our journals and guides.